The indie genre of music is often recognized for its artistic and quirky approach to music videos and advertising. In many ways our video complies with these generic conventions. The use of plasticine animation adds a unique and innovative attribute, similar to that in well-known indie videos such as ‘pumping on your stereo’ by Supergrass ( http://www.youtube.com/watch?v=qQbVyWED6Ac ). The use of bright colours, abstract mise-en-scene and an engaging storyline makes the video generic and typical of this style of music; whilst our combination of real-life footage and animation could be seen as a unusual format and therefore a way of challenging conventions. The costume and action within our video and advertisements was also specifically chosen to relate to the style of other indie music and artists. One example is the artist playing the guitar. Indie and Rock music videos are often performance based, and instrumental sections are enhanced by footage of the artist playing the instrument. Using this technique within our own video meant that the audience could establish both a relationship with the plasticine figure as well as the real-life artist and his style of performing. The 2 images below show indie artists (paolo nutini and Jason mraz) that are shown wearing items of clothing that are stereoptyically ‘indie’. Our character is seen wearing similar clothes to the artists below. Costume was an element where we chose to use generic ideas and develop the conventions of other real music videos.

 Goodwin’s Theory outlines some techniques that are used amongst all music videos to either comply with or challenge conventions. We took all of these into account when developing our media product. The first was Lyrics and Visuals (considering the relationship between the words of the song and the video footage). We found that it was common for indie videos to relate the story of the lyrics to the video itself, so used this format in our own video. Another was Music and Visuals (the connection between the pace of the music and the pace of the shots/transitions). This was another area in which we complied with common indie conventions and made the shots flow fluently with the tone of the music.
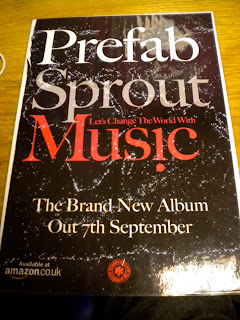
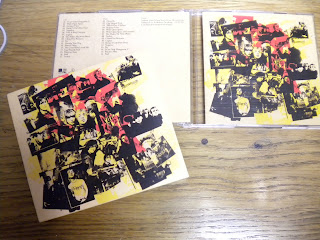
Our ancillary media texts also had a strong link with real magazine adverts and digipak covers. By looking at a variety of products before making our own we could generate a list of the information that is consistently included and make sure it was incorporated in our own. Examples include, Tracklist, Price, DVD Logo, Ratings, Reviews, Barcode, Variety of Fonts, Artist name and Song Title. We also found that real magazine adverts or digipak covers would often have a strong link to the artist or video that they were advertising. In our own pieces we used settings and colour schemes from the video to develop continuity and encourage the viewer to connect elements that they can see in all 3 products.
2. How effective is the combination of your main product and ancillary texts?
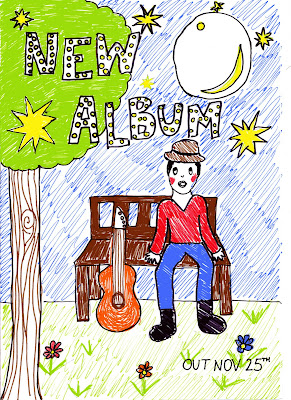
From the beginning of the project I understood how important it was that our video and ancillary products complimented each other and had a theme or stylistic element that made them recognizable. Before we had started any preparation for the music video, we planned and drew detailed drawings of our ancillary products in order to confirm that our 3 products would link with, and relate to, one another.
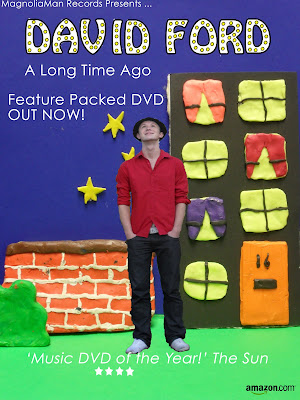
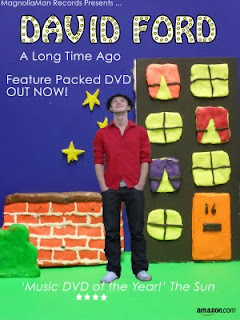 For this ancillary product we decided to put our real-life character into the plasticine world. We have used a background/setting that is also shown in our video in order to develop continuity. The bright colours and creative mise-en-scene relates not only to the style of our video, but more broadly to the indie genre. Many indie bands use artistic advertising techniques that grab the viewers attention and force the audience into wondering what the advert is about and therefore wanting to watch the video or find out more about the artist. I believe our magazine advert does this successfully as the combination of the real-life character and the plasticine setting gives the impression of the ‘un-known’ and persuades the audience into wanting to know more about the artist and his environment, whilst he seemingly finds out for himself. The artistic and compositional elements of this piece also helped us to engage the audience. The use of the yellow windows that lead the spectator’s eye from the yellow within the title down to the floor and then back up to stars ensure that the viewer reads and focuses upon all of the information.
 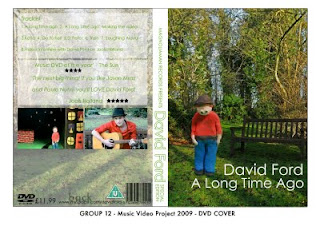 The photo we used was the antithesis of our magazine advert. We have used a real-life setting and put our plasticine character into it using editing techniques (Photoshop).
3. What have you learnt from your audience feedback?
As with real media products, it was important that we developed our product based on thorough constructive audience feedback. Within class we did a series of activities that allowed us to exhibit our rough-cuts and gain feedback and comments from our peers and teachers. One piece of feedback we initially received was that our video had to be more precisely timed with the lyrics. We took this into account and when editing used the marker tool on final cut to correctly alight pieces of footage with each section of the song. Precision timing meant that our piece appeared more professional and fluent. Our audience and peers also questioned how effective the combination of real life footage and animation was going to be. However, we stuck by this concept as we were intent on encouraging the audience to relate to both our artists real persona as a genuine and friendly guy, as well as his emotions and feelings that are represented through the plasticine figures. Another piece of constructive feedback that influenced our final video was that the end shot of Jamie playing the guitar was to repetitive and made the piece seem amateur due to the lack of variation. We made a conscious effort to change this as we could appreciate how the end shot did become ‘boring’. We took a risk by filming the extra shots of footage on the day of our deadline, as we then had only a short period of time to embed the close-up shots and make them run smoothly with the other footage.
Receiving informative feedback throughout the project definitely assisted my group and I in developing our video to attract the correct audience and understand the elements that were a success.
4. How did you use new media technologies in the construction and research, planning and evaluation stages?
This project has developed both my knowledge and understanding of new media technologies.
The internet has been extremely beneficial in all areas of this task. In the research stages it allowed us to, discover artists that had a similar indie style to David Ford, watch their videos using YouTube and analyse the stylistic techniques they used, approach the artist through the social networking site MySpace and access the artists website and gain an understanding of how he wishes to be represented. It also meant we could gather images that inspired our prop and costume ideas as well as colour schemes, settings and lighting.
We also used the internet to host our Media Blog. We used Blogger.com to set up a blog that all members of the group could access and update on regular basis, both from home or in college. Using the blog meant that each one of us could add to and read over our ideas as they developed over the weeks that we were working on this task. It also ensured that there was a constant log of where we were at with the project, and a regular reassurance that each member of the group was involved and aware of what was going on within the task.
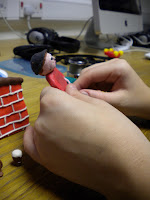
This project also helped increase and expand upon my knowledge of FinalCut and IStopMotion. Both of these programmes are new media technologies that have had a great impact on the changes in media production. Using both online and classroom tutorials, my group and I used final cut to edit and change the colouring of our footage in order to make it seem, in places, more saturated and in others less bright etc. Relying on the light of the classroom (in order to not make the plasticine melt), meant that the continuity of lighting was not very professional. Although in places this is still an issue, FinalCut definitely allowed us to edit and tweak the lighting using efficient but effective filters.
IStopMotion was a new media technology that I wasn’t particularly familiar with. This project assisted me in developing my skills within this programme, and encouraged me to focus on a video ‘frame-by-frame’ in order to create smooth, precise and fluent footage.
